Organized Portable Office: Easy Home Workspace Ideas
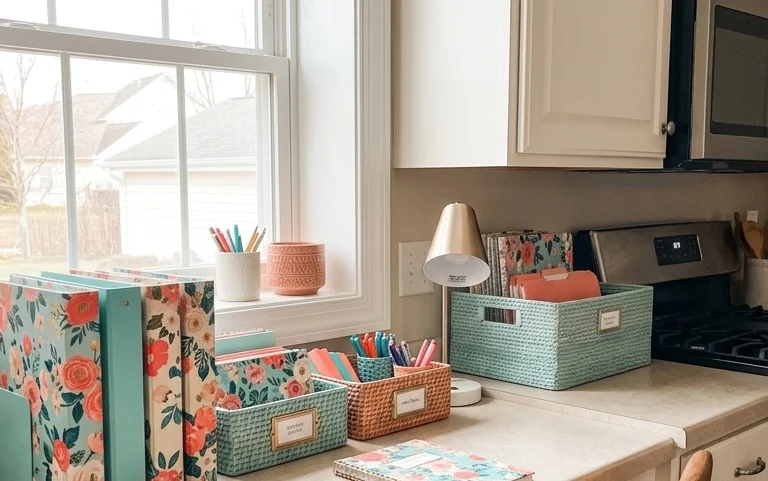
My organized portable home office is a game-changer for anyone struggling with the constant clutter of work-from-home life. Sound familiar? Papers spilling onto the kitchen counter, your laptop hogging the dining table, and that nagging feeling that your workspace is never truly *away*? I’ve been there! But now, I have a dedicated, neat, and incredibly functional space that packs up in minutes, transforming my living area back into a peaceful sanctuary. Imagine a stylish caddy holding all your essentials, a comfortable laptop stand, and a designated spot for everything. This solution can be set up for under $50 and takes less than an hour. In this article, I’ll share exactly how I created it, so you can reclaim your home and boost your productivity, all without a permanent desk.
My Organized Portable Home Office: Creating Your Dream Workspace Anywhere
The freelance life, the side hustle, the remote work revolution – they all have one thing in common: the need for a dedicated workspace. But what if you don’t have a spare room, or even a dedicated corner? What if your living space is multi-functional, and your home office needs to pack up and disappear when guests arrive or when you simply want a change of scenery? This is where the concept of an organized, portable home office truly shines. I’ve spent years refining my own mobile workspace, and I’m excited to share how you can create yours. It’s about creating a functional, inspiring, and clutter-free zone that can exist wherever you are, whenever you need it.
What You Need and Roughly What It Costs
The beauty of a portable office is its scalability. You can invest heavily or keep it budget-friendly. Here’s a breakdown of what I consider essential and some approximate costs to get you started. Remember, these are rough estimates, and sales, secondhand finds, and DIY projects can significantly reduce these figures.
* **A Compact Desk or Workspace Surface:** This is your anchor. Options include:
* **Foldable Desk:** A simple, sturdy folding desk is a game-changer. Look for one at least 30 inches wide and 18 inches deep. (Rough Cost: $70 – $200)
* **Wall-Mounted Fold-Down Desk:** Ideal for very small spaces, these attach to the wall and fold up to be almost invisible. (Rough Cost: $100 – $300)
* **Lap Desk with Legs:** For the ultimate in portability, a substantial lap desk can work for shorter periods. Ensure it has a firm, flat surface. (Rough Cost: $40 – $100)
* **Portable Storage Solutions:** This is where the magic of organization happens.
* **Rolling Cart with Drawers:** A three-drawer rolling cart (approximately 15 inches wide, 18 inches deep, 25 inches tall) is perfect for storing supplies, documents, and tech accessories. (Rough Cost: $50 – $150)
* **Stackable Drawer Units:** Smaller, clear stackable drawers are great for pens, clips, and other small items. (Rough Cost: $20 – $60 for a set)
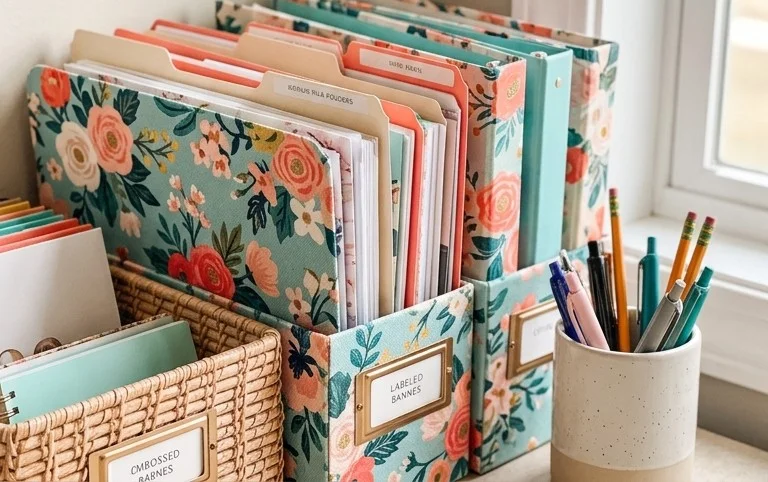
* **Magazine Holders/File Sorters:** A couple of sturdy magazine holders (around 10 inches tall) can keep papers and notebooks upright and accessible. (Rough Cost: $15 – $40 for a pair)
* **Fabric Bins or Boxes:** For less frequently used items or aesthetic appeal, consider a few attractive fabric bins (e.g., 12x12x10 inches). (Rough Cost: $10 – $30 each)
* **Comfortable, Compact Seating:**
* **Folding Chair:** A sturdy, comfortable folding chair that can be easily stored. Look for one with some padding. (Rough Cost: $50 – $150)
* **Stool with Storage:** Some stools offer hidden storage, doubling up on functionality. (Rough Cost: $60 – $120)
* **Essential Tech & Accessories:**
* **Laptop Stand:** To improve ergonomics and airflow. (Rough Cost: $20 – $50)
* **Portable Monitor (Optional):** If your work demands a second screen, a lightweight portable monitor can be a luxury. (Rough Cost: $150 – $300)
* **Compact Keyboard and Mouse:** Wireless options are ideal. (Rough Cost: $30 – $80)
* **Desk Lamp:** A flexible, LED desk lamp with adjustable brightness is a must. (Rough Cost: $20 – $60)
* **Power Strip with USB Ports:** To manage all your charging needs. (Rough Cost: $20 – $40)
* **Organizational Tools:**
* **Pen Cups/Organizers:** To keep writing implements tidy. (Rough Cost: $5 – $20)
* **Cable Management:** Ties, sleeves, or clips to keep cords neat. (Rough Cost: $10 – $30)
* **Notebooks and Planners:** For jotting down ideas and tasks. (Rough Cost: $5 – $30 each)
**Total Estimated Cost:** For a robust, well-equipped portable office, you’re looking at a range of **$450 – $1,300**. However, you can absolutely start with a good desk, a rolling cart, and basic organizers for under $300.
How to Measure and Plan Before You Start
Don’t just dive in and buy things! Planning is crucial for a successful portable office, especially in a multi-use space.
1. **Assess Your Space:** Where will your office *primarily* be set up? Measure the available footprint. For example, if it’s a corner of your living room, measure the length and depth of that corner. If it’s a dining table, measure the usable surface area when cleared. Consider the height you’ll need for your monitor and lamp.
2. **Identify Your Needs:** What are the absolute essentials for your work?
* Do you need space for a full-size keyboard and mouse, or is a laptop sufficient?
* How many notebooks or binders do you regularly access?
* What types of supplies do you use most often (pens, paperclips, chargers, etc.)?
* Do you need space for a printer, or can you outsource printing?
3. **Consider Portability:** How often do you need to pack it up? If it’s daily, lightweight, foldable items are paramount. If it’s occasional, a slightly heavier but more robust setup is fine.
4. **Think About Storage When Packed:** Where will your office components go when they’re not in use? Measure the space where they will be stored (e.g., a closet, under a bed). This will dictate the maximum size of your folded desk or the dimensions of your storage cart.
5. **Sketch It Out:** Draw a simple diagram of your chosen space and how your desk, cart, and other elements will fit. This visual aid is invaluable. For instance, if you have a 4ft x 3ft area, you know your desk can’t be larger than 48 inches wide and you’ll have 36 inches of depth for your cart and chair.
The Process: A Clear Numbered Walkthrough
Let’s get this organized portable office set up!
1. **Choose Your Desk:** Based on your measurements and needs, select your primary workspace. If you’re using a foldable desk, ensure it’s stable when open. If it’s a wall-mounted option, confirm it’s securely installed (or follow rental-friendly instructions).
2. **Position Your Desk:** Place your desk in your designated spot. Ensure there’s enough room to pull out your chair and access your storage.
3. **Set Up Your Rolling Cart/Storage Unit:** Position your rolling cart next to your desk, ideally within arm’s reach. If you have multiple storage units, arrange them logically. For example, the cart with frequently used items can be closest.
4. **Assemble Your Seating:** Unfold or place your chair so it’s ready to use.
5. **Install Your Tech:**
* Place your laptop on its stand.
* Connect your keyboard and mouse.
* Plug in your portable monitor, if using.
* Connect your power strip to a nearby outlet.
6. **Organize Your Supplies:** This is where the magic happens!
* **Top Drawers of Cart:** For frequently used items: pens, pencils, sticky notes, paper clips, a small stapler, charging cables.
* **Middle Drawers of Cart:** For less frequently used supplies: extra notebooks, bulkier stationery, spare batteries.
* **Bottom Drawer of Cart:** For documents or tech accessories: files, external hard drives, spare USB drives.
* **Magazine Holders/File Sorters:** For current projects, notebooks you’re actively using, or important papers that need quick access.
* **Fabric Bins:** For items you want out of sight but accessible: spare tech gadgets, larger stationery supplies, or even snacks!
7. **Arrange Your Desk Surface:** Keep it intentionally minimalist.
* Laptop and stand.
* Keyboard and mouse.
* Desk lamp.
* One or two essential notebooks.
* A small, attractive container for pens.
* A coaster for your drink.
8. **Manage Cables:** Use your cable ties or sleeves to bundle and hide as many cords as possible. This instantly elevates the look and reduces visual clutter.
9. **Personalize (Lightly):** Add a small plant, a framed photo, or an inspiring piece of art that can be easily removed.
Adapting for a Small Space or Rental
The beauty of a portable office is its adaptability.
* **Small Spaces:**
* **Wall-Mounted Fold-Down Desk:** This is a vertical solution that maximizes floor space.
* **Corner Solution:** Utilize the often-unused space in a corner with a compact L-shaped foldable desk or a standard desk paired with a slim rolling cart.
* **Behind the Sofa:** A narrow console table can serve as a temporary desk, with storage tucked underneath.
* **Rentals (No Drilling Allowed):**
* **Adhesive Hooks and Strips:** Use heavy-duty adhesive strips for hanging small items like cable organizers or even a lightweight file sorter on the side of your desk or cart. Test these in an inconspicuous area first!
* **Freestanding Shelving Units:** Opt for tension rod shelves or sturdy, freestanding shelving units that don’t require drilling.
* **Stackable Storage:** Maximize vertical space with stackable bins and drawers that can be placed on the floor or on existing furniture.
* **Freestanding Desk with Storage:** Choose a desk that has integrated drawers or shelves, or pair a simple folding desk with a rolling cart.
Styling Notes: Color, Texture, and Placement
A portable office shouldn’t just be functional; it should be a joy to work in.
* **Color Palette:** Choose calming, neutral colors for your main furniture pieces (desk, cart). Think soft grays, whites, light woods, or muted blues. Then, inject personality with accent colors through your accessories: colorful notebooks, a vibrant desk mat, or a bright pen cup. This allows you to easily swap out colors if you desire a refresh.
* **Texture:** Mix textures to add warmth and interest. A woven basket for storage, a smooth metal desk lamp, a soft fabric organizer, and the natural texture of paper in your notebooks all contribute to a visually appealing space.
* **What to Put Where:**
* **Desk Surface:** Only the absolute essentials. Your laptop, keyboard, mouse, a pen holder, and a lamp. This keeps your focus sharp.
* **Within Arm’s Reach (Cart/Drawer Top):** Frequently used items – pens, sticky notes, phone charger, earbuds.
* **Slightly Further Away (Mid-Cart/Drawers):** Less frequently used items – spare notebooks, bulk supplies, printing paper.
* **Out of Sight (Bottom Drawers/Bins):** Items you need but don’t want to see daily – extra cables, archived documents, less common tech accessories.
* **Vertical Space:** Magazine holders for active files, and perhaps a small shelf if your desk allows for it.
Keeping It Tidy After Week One
The initial setup is exciting, but the real test is sustained tidiness.
* **The “One-Touch” Rule:** If an item can be put away in one motion, do it immediately. This means refiling a document as soon as you’re done with it, or putting a pen back in its holder.
* **End-of-Day Sweep:** Dedicate 5-10 minutes at the end of each workday to clear your desk surface, put stray items back in their designated spots, and tidy your immediate workspace.
* **Weekly Declutter:** Once a week, spend 15-20 minutes reviewing your storage. File any accumulated papers, wipe down surfaces, and check for any items that have crept into your workspace that don’t belong.
* **”Home” for Everything:** Every single item should have a designated home. If something doesn’t have a place, it’s clutter waiting to happen. Re-evaluate your storage solutions if needed.
Mistakes That Make This Fail
Even the best-laid plans can go awry. Here are common pitfalls to avoid:
* **Over-Buying:** Resist the urge to buy every organizational product you see. Start with the essentials and add only what you genuinely need.
* **Ignoring Measurements:** Failing to measure your space and your intended storage areas leads to items that don’t fit or are too cumbersome.
* **Not Prioritizing Ergonomics:** A cramped or uncomfortable workspace will lead to physical strain and a reluctance to work. Invest in a comfortable chair and consider a laptop stand.
* **Clutter Accumulation:** The biggest failure is letting clutter creep back in. Without a dedicated routine for tidying, even the most organized system will break down.
* **Too Much Stuff:** Trying to fit your entire office into a portable setup is unrealistic. Be ruthless about what you *really* need to have on hand daily. Less is often more.
* **Forgetting Portability When Packing:** If you need to pack it up daily, ensure all components are lightweight and easy to move. A heavy, multi-piece setup will quickly become a burden.
Creating an organized portable home office is an investment in your productivity and well-being. It’s about reclaiming your focus and creating a dedicated space for your work, no matter where you are. With careful planning and a commitment to tidiness, you can build a workspace that is both beautiful and incredibly functional.
Conclusion
Creating a my organized portable home office isn’t just about aesthetics; it’s about reclaiming your peace and productivity. Imagine the ease of finding what you need instantly, the reduced stress of a clutter-free workspace, and the renewed focus that comes with order. This transformation, even in small doses, makes a remarkable difference to your day-to-day experience.
Ready to start? Your smallest first step today could be simply clearing off your desk surface or designating one drawer for office essentials. If a full portable office isn’t your current need, consider a streamlined desk organizer for your kitchen counter, or a stylish storage basket for your living room to keep hobby supplies tidy. The possibilities for an organized life are endless!
We invite you to explore more ideas and discover how a little organization can bring a lot of joy and efficiency into your home.
