Easy DIY Flower Tealight Holder Ideas
DIY flower tealights are a beautiful way to banish that nagging feeling of clutter and create a cozy, inviting atmosphere. Does your coffee table or bookshelf feel a little bare, or perhaps you’re tired of seeing those same old, uninspired accents? I know I’ve been there! Imagine the soft glow of these charming little creations illuminating your space, each one a unique, handcrafted piece of art. Best of all, you can create a set of these delightful tealights for under $10 and in less than an hour. In this article, I’ll show you exactly how to transform simple materials into these stunning floral delights, breathing new life and warmth into your home.
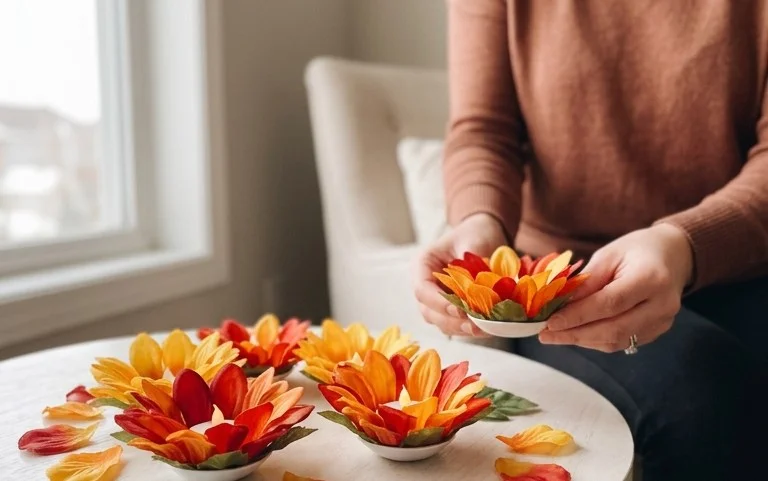
Brighten Your Space: Crafting Your Own DIY Flower Tealight Holder
There’s something undeniably magical about the soft glow of a tealight, isn’t there? It instantly adds warmth, ambiance, and a touch of cozy charm to any room. While store-bought tealight holders are readily available, there’s a special satisfaction that comes from creating something beautiful with your own hands. Today, I want to share a simple yet stunning DIY project that will elevate your home decor and bring a touch of nature indoors: a DIY flower tealight holder. This project is surprisingly easy, budget-friendly, and can be adapted to suit your style and space.
What You’ll Need and Roughly What It Costs
Gathering your supplies is the first step to any successful DIY. For this project, you won’t need a whole workshop full of tools, making it perfect for beginners.
Here’s a breakdown of what you’ll need and an estimate of the costs:
-
Glass Jars or Vases: The foundation of our tealight holder. You can use anything from repurposed jam jars to small, clear glass vases. For this project, I recommend using clear glass so the light can shine through. Aim for jars that are around 3-4 inches (7.5-10 cm) in diameter and 4-6 inches (10-15 cm) tall.
- *Cost Estimate:* Free if you repurpose, or approximately $1-$5 per jar/vase from thrift stores or discount home goods stores.
-
Floral Foam (Dry): This is what will hold our faux flowers in place. Make sure you get the dry kind, not the wet floral foam used for fresh flowers. A small block should be more than enough.
- *Cost Estimate:* Around $3-$6 for a small block.
-
Faux Flowers: This is where you can let your creativity shine! I recommend a mix of small, delicate blooms and some filler greenery. Think small roses, hydrangeas, or even some sprigs of baby’s breath. The key is to choose flowers that aren’t too bulky and can fit around a tealight. About 10-15 stems should be sufficient, depending on their size.
- *Cost Estimate:* Around $10-$20 for a good selection from a craft store. Look for sales!
-
Floral Wire or Craft Wire: This will help secure the floral foam and potentially some of the flower stems. A small spool is all you need.
- *Cost Estimate:* Around $2-$4.
-
Scissors or Craft Knife: For cutting the floral foam.
- *Cost Estimate:* Likely already in your craft drawer.
-
Hot Glue Gun and Glue Sticks: To secure elements and create a stable structure.
- *Cost Estimate:* Around $10-$15 for a basic glue gun and a pack of glue sticks.
-
Tealight Candles: Of course! You can use real tealights or battery-operated LED tealights for safety.
- *Cost Estimate:* $3-$7 for a pack of tealights or LED tealights.
So, in total, you’re looking at an estimated cost of around $29-$50, depending on what you already own and where you source your materials. This is a fantastic way to get a custom piece of decor for a fraction of the price of something similar in a boutique.
Measuring and Planning Before You Start
Before you dive headfirst into cutting and gluing, a little planning goes a long way. This is especially true if you’re working with specific dimensions in mind.
Understanding Your Vessel
First, take a good look at your glass jar or vase. Measure its internal diameter at the top opening. This measurement is crucial for determining how much floral foam you’ll need. Also, measure the height of the jar. This will give you an idea of how much foam you can comfortably fit inside without it overflowing.
Floral Foam Sizing
Once you have the internal diameter of your jar, you can estimate the size of the floral foam block you’ll need. Ideally, you want the foam to fit snugly inside the jar. If your block is slightly too large, that’s okay – you can trim it. If it’s too small, you might need to get a slightly larger block or consider using multiple smaller pieces and securing them together with hot glue.
Flower Placement Visualization
Now, imagine your flowers. How do you want them to look? Do you want a dense, full arrangement, or something more airy and delicate? Consider the heights of your flowers. You’ll want some to sit lower, closer to the foam, and others to extend upwards. Think about colour combinations. A monochromatic scheme can be elegant, while a riot of colours can be joyful. Lay out your faux flowers loosely and arrange them in front of the jar to get a visual sense of what you want to achieve. This simple step will save you a lot of rearranging later.
Your Step-by-Step DIY Flower Tealight Holder Guide
Ready to create some floral magic? Let’s get started!
- Prepare the Floral Foam: Take your block of dry floral foam and measure the internal diameter of your glass jar. Using a sharp craft knife or scissors, carefully cut a piece of floral foam that is slightly larger than this diameter. You want it to be a snug fit. If your jar is deep, you might need to cut it into two or more layers and stack them.
- Secure the Foam: Gently press the cut floral foam into the jar. It should sit firmly. If it feels a little loose, you can use small pieces of floral wire wrapped around the foam and extending down the sides of the jar to help secure it, or even a bead of hot glue around the edges where the foam meets the glass.
- Trim and Shape (if needed): Once the foam is in place, assess its height. You want it to be slightly below the rim of the jar, giving you space to arrange your flowers without them crowding the opening. Trim any excess foam with your craft knife. You can also gently round the edges of the foam to create a softer base.
- Begin Arranging Your Flowers: Start by inserting your filler greenery. This will create a base and help hide the floral foam. Then, begin inserting your larger faux flowers, pushing their stems firmly into the foam. Work your way around the jar, creating your desired shape and density. Don’t be afraid to experiment!
- Add Smaller Blooms and Details: Once the main flowers are in place, fill in any gaps with smaller blooms and more greenery. Rotate the jar as you work to ensure a balanced arrangement from all angles.
- Insert the Tealight: Once your floral arrangement is complete and you’re happy with how it looks, carefully place your tealight candle in the centre of the arrangement, nestled amongst the flowers. If you’re using a real tealight, make sure there’s enough space around it to prevent any contact with the faux flowers. For safety, I often prefer LED tealights.
Adapting for Small Spaces or Rentals
The beauty of this DIY is its adaptability. If you live in a small apartment or a rental where drilling is a no-go, this project is perfect for you. The use of a jar or vase means there’s no permanent attachment required.
- Size Matters: For a truly small space, opt for smaller jars or even shot glasses as your base. You can create a cluster of these mini tealight holders for a charming display.
- Wall Decor Alternative: If you want a wall-mounted look without drilling, consider using a shallow decorative tray or a shallow wooden box. You can fill this with floral foam and arrange your flowers and tealights within it. Place the tray on a shelf or a console table.
- Floating Effect: For a touch of elegance, you can use a tall, narrow vase and fill it with water. Then, carefully place a floating candle (a wider, flatter candle designed to float) in the centre. You can then arrange a few delicate stems of greenery or single flowers around the rim of the vase. This creates a beautiful, ethereal look.
Styling Notes: Making it Look Good, In Use and Out
Once your beautiful tealight holder is created, how do you style it to maximize its impact?
- Colour Palette: Consider the existing colours in your room. Do you want the tealight holder to be a pop of colour, or blend in harmoniously? For a calming effect, stick to muted tones like creams, soft pinks, and greens. For a bolder statement, don’t shy away from vibrant hues.
- Texture Play: Mix textures in your floral arrangement. Combine smooth petals with rougher greenery, or add a touch of sparkle with some glitter-dusted leaves (use sparingly!). This adds depth and visual interest.
- Placement is Key: Think about where you’ll place your tealight holder. It can be a stunning centrepiece on a coffee table, a welcoming addition to an entryway console, or a cozy accent on a bedside table. When placing it, consider the height. If it’s in a corner, a taller arrangement might be best. If it’s on a low table, a more compact design will work well.
- Surrounding Elements: Don’t let your tealight holder be an island. Group it with other decorative items. A stack of books, a small decorative tray, or a few coordinating coasters can all complement your creation and tie the vignette together.
- When Lit: When the tealight is lit, the flowers will cast beautiful shadows. Ensure there are no large, dark leaves directly in front of the flame that might obscure the light. Position the flowers so they allow the glow to emanate outwards.
Keeping it Tidy After Week One
The joy of faux flowers is their longevity, but even a DIY creation needs a little upkeep to stay looking its best.
- Dusting: After about a week, you’ll notice a thin layer of dust has settled on your faux flowers. A soft paintbrush or a can of compressed air is your best friend here. Gently brush away the dust from the petals and leaves. For more stubborn dust, a quick blast of compressed air can work wonders.
- Re-fluffing: Sometimes, the faux flowers might get a little flattened from handling or just from being arranged for a while. Gently bend and shape the petals and leaves to their original position. This will help them look fresh and vibrant.
- Loose Bits: If any small pieces have come loose due to handling or the heat from the candle (even if it’s LED, there can be some residual warmth), a quick touch-up with your hot glue gun will do the trick.
- Candle Care: If you’re using real tealights, remember to trim the wick if it gets too long before lighting. This helps with a cleaner burn and reduces soot. For LED tealights, simply ensure the batteries are fresh.
Mistakes That Make This Fail
Even the simplest DIY projects can encounter a few hiccups. Here are some common mistakes to avoid to ensure your flower tealight holder is a smashing success:
- Using Wet Floral Foam: This is a big one! Dry floral foam is designed for faux flowers. Wet foam is intended for fresh flowers and will likely degrade and crumble, making a mess and potentially damaging your jar.
- Overcrowding the Flowers: Trying to cram too many flowers into a small space will make your arrangement look messy and can even be a fire hazard if real tealights are used. Less can often be more when it comes to floral arrangements. Give each bloom some breathing room.
- Forgetting About Safety with Real Tealights: If you’re opting for real tealights, ensure there is ample space between the flame and any part of the faux flowers. Avoid having petals or leaves directly above or too close to the flame. Consider trimming down the floral foam so the candle sits lower and is more protected. Using LED tealights is generally the safest option.
- Not Securing the Floral Foam Adequately: If the foam shifts around inside the jar, your flowers will become dislodged, and the whole arrangement will look unprofessional. Make sure it’s a snug fit or secured with wire or glue.
- Ignoring Scale: Using large, bulky flowers in a tiny jar will look disproportionate and out of place. Similarly, tiny flowers in a large vase might get lost. Always consider the scale of your vessel and your blooms.
Creating your own DIY flower tealight holder is a rewarding and enjoyable process. With a few simple materials and a touch of creativity, you can craft a beautiful and unique piece of decor that brings warmth and charm to your home. So, gather your supplies, let your imagination bloom, and get ready to illuminate your space with a touch of handmade magic!
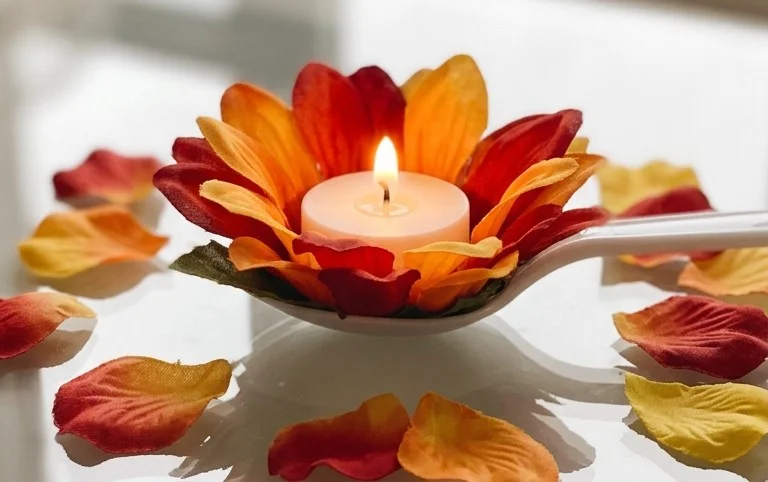
Conclusion
Adding a touch of nature with your own DIY flower tealight can truly brighten your everyday space. It’s the little handmade touches that bring warmth and personality to a room, transforming the mundane into something special. Imagine the gentle glow adding a cozy ambiance to your evenings!
Ready to create your own? Your smallest first step today is simply gathering a few dried flowers and a plain glass jar. Even just one beautiful creation will make a difference.
For a different vibe, consider using scented dried herbs for a kitchen, or vibrant faux flowers for a child’s room. For a budget-friendly option, explore using colorful paper scraps instead of dried petals.
We hope this DIY flower tealight inspires you to bring more handmade charm into your home. Continue exploring our site for even more creative home decor and organization ideas!
