Clever Under Stair Shoe Storage Ideas
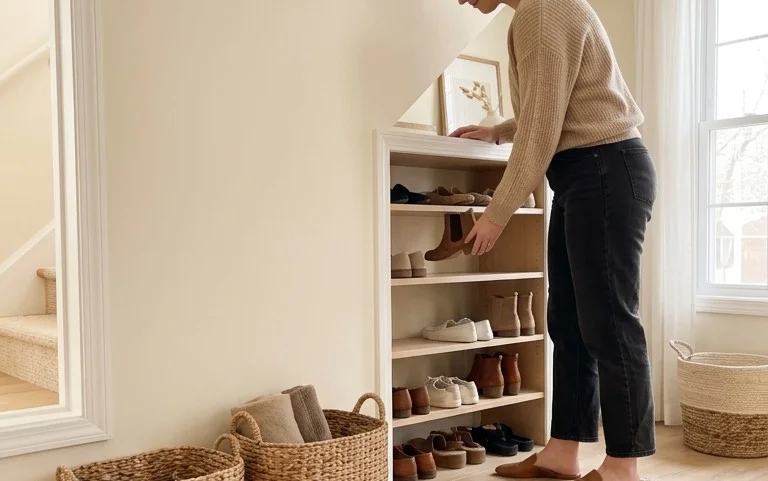
25 Clever and Stylish Under the Stair Shoe Storage Solutions can be a game-changer for any home! Do you ever find yourself tripping over a growing collection of sneakers, heels, and boots the moment you walk through the door? I know I do! That unruly pile that seems to multiply overnight, cluttering your entryway and making mornings a frantic search. Imagine instead, a beautifully organized space where every pair has its designated spot, neatly tucked away yet easily accessible. It’s the dream, right? And the best part is, many of these solutions are surprisingly affordable, often costing under $50 and taking just an afternoon to implement. In this article, I’m going to walk you through 25 ingenious ways to transform that forgotten space under your stairs into a functional and chic shoe haven. You’ll learn about everything from simple DIY hacks to stylish ready-made units, perfect for any budget and skill level.
25 Clever and Stylish Under the Stair Shoe Storage Solutions
The space beneath your stairs. It’s a classic conundrum in home design. Often a dark, forgotten corner, it can quickly become a dumping ground for… well, anything. But I’ve found that one of the most persistent and visually jarring problems this awkward nook presents is the shoe pile. Whether it’s a family of four or just your own growing collection, shoes have a tendency to multiply and sprawl. But fear not, because today we’re transforming that under-stair chaos into a haven of chic, organized footwear. I’m going to walk you through 25 ingenious and stylish solutions for under-the-stair shoe storage, focusing on practicality, aesthetics, and keeping your home looking its best.
Unlocking Your Under-Stair Potential: What You Need and How to Plan
Before we dive into the fun part – picking out your perfect storage solution – let’s talk logistics. This isn’t about a quick fix; it’s about creating a system that works for your life and your home.
Gathering Your Gear: What You’ll Need and Rough Costs
The “what you need” will vary wildly depending on the solution you choose, but generally, you can expect to invest in:
* **Shelving Units/Modular Systems:** These can range from simple IKEA Kallax units (starting around $60-$100 depending on size) to custom-built shelves. Basic pre-made shoe racks might cost between $30-$70.
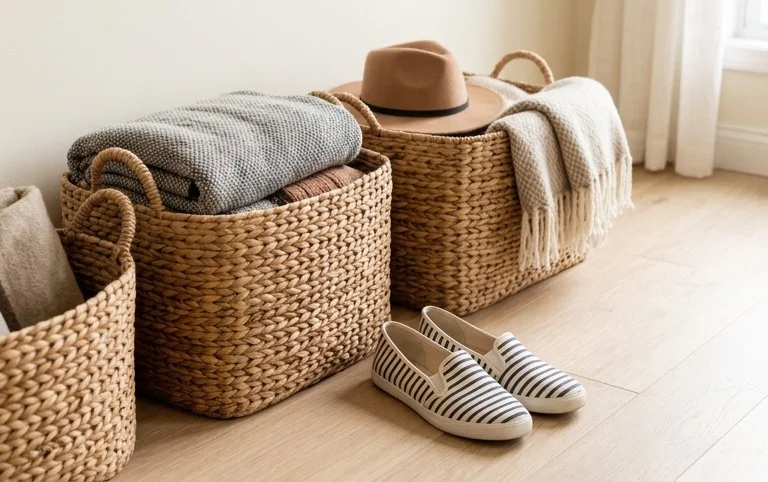
* **Drawers/Baskets:** For a cleaner look, consider drawer units or attractive baskets. A set of three woven baskets might cost $40-$80, while a small set of drawers could be $50-$150.
* **Hardware:** Screws, brackets, drawer slides, and knobs will add to the cost, typically $20-$50.
* **Paint/Finishing:** If you’re painting or staining, budget around $20-$40 for supplies.
* **Tools:** You’ll likely need a measuring tape, level, drill, screwdriver, and possibly a saw if you’re customizing. If you don’t have these, a basic toolkit can be around $50-$100.
The overall cost for a DIY solution can range from as little as $50 for a very basic setup to $300-$500 for a more elaborate built-in system. For rental-friendly options, you’ll be looking at freestanding units, which fall within the $50-$200 range.
Measuring Up: The Blueprint for Success
This is the most crucial step, so grab your measuring tape!
1. **Measure the Width:** Measure the width of the space at the widest point, and then at the narrowest point. Note any irregularities.
2. **Measure the Depth:** Measure from the edge of the stairs to the back wall. Again, check for consistent depth.
3. **Measure the Height:** This is where it gets interesting. The height will change dramatically as you go deeper under the stairs. Measure the vertical space at regular intervals (e.g., every 12 inches or 30 cm) from the floor to the underside of the stairs. This will help you determine the maximum height of shelves or compartments you can install.
4. **Note Obstructions:** Are there any pipes, electrical boxes, or structural elements that will affect your design? Make a note of their exact location and dimensions.
5. **Consider Your Shoe Collection:** How many pairs of shoes do you typically need to store here? Think about different types – heels, boots, sneakers, sandals. This will dictate the size and number of compartments you need.
Once you have these measurements, sketch out your space. This visual representation will be invaluable as you start planning your chosen storage solution.
The Clever & Stylish Solutions: Your Step-by-Step Guide
Now for the exciting part! Here are some of my favourite ways to tackle under-stair shoe storage, along with a general walkthrough.
The Basic Built-In: Functional and Aesthetic
This is a fantastic option if you own your home and want a seamless, integrated look.
Process Walkthrough:
1. **Design Your Shelves:** Based on your measurements, plan the layout of your shelves. Consider different heights for different shoe types. For example, you might want 6-inch shelves for sandals, 8-inch shelves for sneakers, and 12-inch shelves for boots.
2. **Source Your Materials:** This could be plywood, MDF, or even reclaimed wood for a rustic feel. If you’re not a seasoned DIYer, consider buying pre-cut lumber from your local hardware store.
3. **Cut and Prepare:** Cut your shelving pieces to size. Sand all edges smooth.
4. **Install Supports:** Decide how you’ll support your shelves. You can attach vertical supports to the wall (ensure you’re hitting studs for stability) or use shelf brackets. For a cleaner look, consider dados (grooves) cut into vertical supports if you’re building a freestanding unit within the space.
5. **Assemble and Install:** Screw your shelves into place, ensuring they are level.
6. **Finish:** Prime and paint or stain your shelves to match your home’s decor. This is where you can really elevate the style!
The Modular Marvel: Flexible and Adaptable
This is where brands like IKEA shine. Their Kallax units, for example, can be configured in countless ways and often fit perfectly into awkward spaces.
Process Walkthrough:
1. **Measure Your Space Against Unit Dimensions:** Find a Kallax (or similar modular system) that fits your width and height constraints. You might need multiple units.
2. **Assemble the Unit(s):** Follow the manufacturer’s instructions to build your unit(s).
3. **Position and Secure (If Possible):** Place the unit(s) in the under-stair space. If you own your home, you can opt to secure them to the wall for added safety, especially if you have children or pets.
4. **Add Inserts:** This is where the magic happens! Use drawers, doors, baskets, or open cubbies to create your desired storage.
The Drawer Solution: Concealing Clutter
For a super sleek and hidden look, drawers are a winner.
Process Walkthrough:
1. **Measure and Design:** Determine the width and depth of the drawers you can fit. Consider the height needed for your shoes.
2. **Build or Buy Drawer Boxes:** You can build simple plywood boxes or purchase pre-made drawer boxes.
3. **Install Drawer Slides:** Attach drawer slides to both the drawer boxes and the inside of the under-stair space (or a custom-built frame). This requires precision.
4. **Fit and Finish:** Insert the drawers. Add fronts and hardware. Paint or stain to match your decor.
### Adapting for Small Spaces and Rentals
The thought of drilling holes can be a deal-breaker in rentals. Don’t worry, we have stylish solutions for you too!
* **Freestanding Shoe Racks:** Opt for slim, multi-tiered shoe racks that can be easily moved. Look for ones that have a small footprint but offer good vertical storage. Prices can range from $30-$70.
* **Over-the-Door Shoe Organizers:** While not strictly *under* the stairs, if your under-stair space has a door, these are a lifesaver. They can hold up to 24 pairs and cost around $20-$40.
* **Stackable Shoe Boxes:** Clear, stackable shoe boxes allow you to see what’s inside and can be arranged in various configurations. You can find sets of 12 for around $30-$50.
* **Cube Storage Units:** Similar to Kallax but often designed to be more portable, these can be placed under the stairs and filled with attractive baskets.
* **Pegboards and Hooks:** For boots or shoes you want to display, consider a sturdy pegboard mounted on the wall (if allowed) with S-hooks to hang boots.
## Styling Notes: Making It Look as Good as It Functions
Storage doesn’t have to be an eyesore. In fact, it can become a beautiful focal point.
Colour and Texture: The Aesthetic Touch
* **Coordinate with Your Hallway:** If your under-stair space opens into your entryway, ensure the storage blends seamlessly with your existing decor.
* **Light and Bright:** White, cream, or light wood tones can make the space feel larger and more open.
* **Deep and Dramatic:** For a bolder look, consider a dark grey, navy, or even a jewel tone if your entryway is more dramatic.
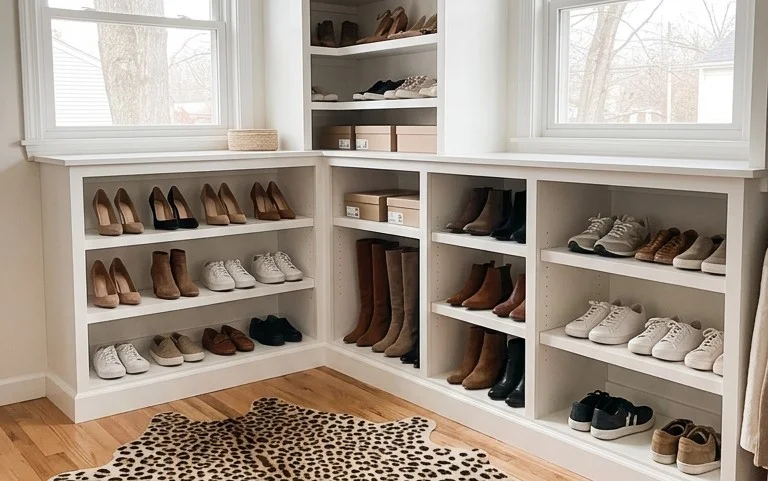
* **Natural Textures:** Woven baskets, rattan, or fabric bins add warmth and texture, softening the look of hard shelving.
* **Pop of Colour:** Use colourful baskets or drawer fronts to add personality.
Strategic Placement: Where Things Belong
* **High-Frequency vs. Low-Frequency:** Keep frequently worn shoes at eye level or easily accessible. Less-used shoes (like special occasion heels or seasonal boots) can go on higher or lower shelves.
* **Boot Accommodation:** If you have tall boots, ensure you have at least one shelf that is 14-18 inches high, or consider a specific boot storage solution like hanging them or using boot shapers.
* **Declutter First:** Only store shoes you actually wear! A rule of thumb is if you haven’t worn it in a year, it’s time to donate.
Keeping It Tidy: The Week After and Beyond
The initial organization is satisfying, but the real victory is sustained tidiness.
The One-In, One-Out Rule (for Shoes!)
This is simple but powerful. When a new pair of shoes comes into the house, an old pair must leave. This prevents the collection from growing unchecked.
The “Shoe Sorter” of the House
Designate one person (or take turns) to be the “shoe sorter” for the week. Their job is to ensure shoes are placed back in their designated spots.
Weekly Tidy-Up
Dedicate 5-10 minutes each week (perhaps during your general cleaning routine) to:
* **Wipe Down Shelves:** Quick dust or wipe.
* **Straighten Shoes:** Ensure everything is facing forward or neatly aligned.
* **Tuck Away Loose Items:** Any stray socks or shoe polish can be put in a dedicated basket or drawer.
The Pitfalls: Mistakes That Make Under-Stair Shoe Storage Fail
Even the best intentions can go awry. Here are common mistakes to avoid:
* **Not Measuring Accurately:** This is the number one killer of DIY projects. Double and triple-check your measurements before buying or cutting anything.
* **Underestimating Shoe Volume:** It’s easy to forget just how many pairs you own. Be realistic about the space you need.
* **Ignoring Depth Variations:** The sloped ceiling of the under-stair space means depth can vary. Design your shelves accordingly.
* **Using Flimsy Materials:** Cheap, wobbly shelves will eventually sag or collapse under the weight of shoes. Invest in sturdy materials.
* **Forgetting Accessibility:** If the back shelves are too deep or too high, they’ll become dead space.
* **Not Considering Ventilation:** Shoes can get damp. Ensure there’s some airflow to prevent musty smells. Open shelving or slatted drawers help.
* **Ignoring Aesthetics:** Even functional storage can be beautiful. Don’t let it become an eyesore that you try to hide.
Transforming your under-stair space into a stylish and functional shoe storage haven is entirely achievable. With a little planning, the right materials, and a dash of creativity, you can banish the shoe pile forever and add a beautiful, organized touch to your home. Happy organizing!
Conclusion
Taming that shoe chaos under the stairs can truly transform your daily routine. No more tripping over rogue sneakers or frantically searching for a matching pair as you dash out the door. A little organization makes a world of difference!
Ready to reclaim your entryway? The smallest possible first step is to simply clear out the existing clutter. Take everything out, dust the space, and then start sorting. For a different room or budget, consider a vertical shoe rack for a narrow closet or a decorative basket for a mudroom.
We hope these under the stair shoe storage solutions have inspired you. Don’t hesitate to explore more ideas to make your home both stylish and effortlessly organized!