DIY Mickey & Minnie Topiary Ideas: Dollar Store Budget
You Can Make Mickey And Minnie Topiaries With Supplies From The Dollar Store And They Are Adorable! Does your home sometimes feel a little…ordinary? Perhaps you’ve got those blank spots on shelves or a corner that just needs a touch of whimsy. Well, get ready to bring some serious Disney magic into your space without breaking the bank! Imagine cute, perfectly round topiaries shaped like everyone’s favorite mouse duo, Mickey and Minnie, adding a playful pop of color and charm to your living room, porch, or even a themed party. For around $10 and just an hour or two of your time, you can create these delightful decorations. In this article, I’ll walk you through exactly how to transform simple dollar store finds into these ridiculously cute Mickey and Minnie topiaries, giving your home that extra special, handcrafted touch.
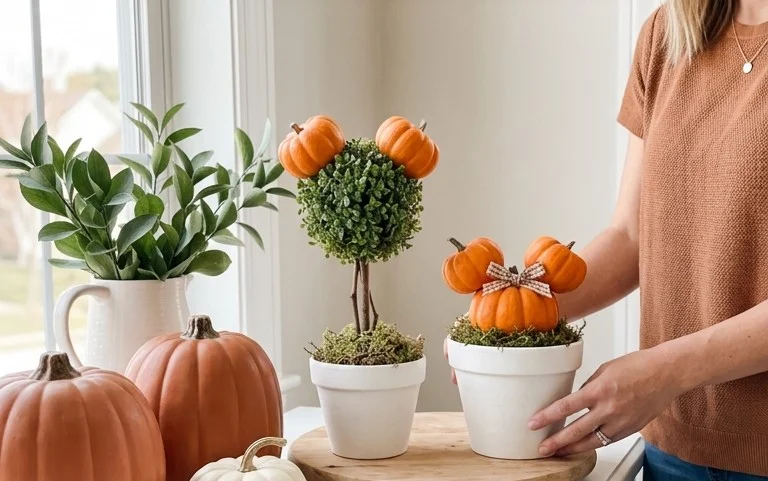
Bring Disney Magic Home with Dollar Store Mickey & Minnie Topiaries!
As a self-proclaimed décor enthusiast who loves a good bargain, I’m always on the lookout for ways to inject personality and charm into my living space without breaking the bank. And lately, I’ve been absolutely smitten with the idea of bringing a touch of Disney magic into my home. But the official Disney décor can be pricey! That’s where my latest DIY obsession comes in: adorable Mickey and Minnie topiaries crafted entirely from supplies found at your local dollar store. Yes, you read that right! With a little creativity and a few dollars, you can create charming focal points that are sure to spark joy.
I’ve been experimenting with this project for a while, and I’m thrilled to share how you can easily recreate these whimsical topiaries. They’re perfect for adding a festive touch to a mantelpiece, a bookshelf, or even a playful accent for a child’s room. And the best part? They’re surprisingly simple to make and incredibly customizable. Let’s dive into how you can bring these sweet characters to life!
Gathering Your Magical Supplies (and Keeping it Budget-Friendly!)
The beauty of this project lies in its affordability. Most of the materials can be found at your local dollar store, keeping the total cost well under $20 for both topiaries. Here’s a breakdown of what you’ll need:
- **For the Heads:** Two large Styrofoam balls (about 6-8 inches in diameter). These are usually sold individually.
- **For the Ears:** Two smaller Styrofoam balls (about 3-4 inches in diameter). You might find these in packs of two or three.
- **For the Stems/Connection:**
- One wooden dowel rod (around 1/2 inch thick and 3-4 feet long). You might need to buy a pack if you can’t find singles.
- A small bag of floral foam or a thicker Styrofoam block.
- Hot glue sticks (a generous amount!).
- **For the Outer “Foliage” (The Fun Part!):** This is where you can really play! I’ve found success with a few different options:
- **Felt:** Several sheets of black felt (you’ll need more for Mickey, less for Minnie).
- **Craft Foam Sheets:** Black craft foam is a good alternative to felt for a slightly more structured look.
- **Pom-Poms:** Small black pom-poms can create a wonderfully textured effect. You’ll need a large bag.
- **For Minnie’s Bow:**
- Red or pink craft foam sheets (or felt in these colors).
- **For the Base:**
- A small, sturdy pot (terracotta or plastic, about 4-6 inches in diameter).
- Filler for the pot (like small rocks, pebbles, or more Styrofoam scraps) to add weight and stability.
- **Tools:**
- Sharp scissors.
- A craft knife (optional, for precise cutting).
- A pencil or marker.
Roughly speaking, you can expect to spend between $10 and $18 total, depending on what you already have on hand and the specific items available at your dollar store. Styrofoam balls are usually around $1-$2 each, dowel rods are often $1-$2, and craft supplies like felt and pom-poms are typically $1-$2 per pack or sheet. Pots can range from $1-$3.
Planning Your Pixie Dust: Measuring and Preparation
Before you start cutting and gluing, a little planning goes a long way to ensure your topiaries turn out perfectly. Let’s think about the scale and placement:
- **Consider the Space:** Where will your topiaries live? If they’re going on a narrow shelf, you’ll want to keep the base and overall height more compact. For a mantelpiece, you have more flexibility. Measure the intended space so you have a clear idea of the maximum height and width.
- **Proportion is Key:** We’re aiming for iconic Mickey and Minnie shapes. The Styrofoam balls are already great starting points for their heads. We’ll use the larger ball for the main head and the smaller ones for the ears. The key is to ensure the ears look proportionate to the head. For an 8-inch head, 4-inch ears generally look good.
- **Stem Length:** Think about how tall you want your topiary to be. A typical dowel rod is about 3 feet long. You can cut this down if needed. For a standard mantelpiece, a topiary that’s about 2-3 feet tall is usually ideal. The length of the dowel will determine the height of your “stem.”
- **Ear Placement:** Mentally (or physically, by holding them up) decide where the ears will attach to the head. They should be spaced evenly and angled slightly outwards for that classic silhouette.
Once you have a general plan, it’s time to prep your materials. If you’re using felt or craft foam, cut it into small, manageable pieces – think 1-inch squares or even smaller if you’re using pom-poms. This will make it much easier to cover the Styrofoam.
The Enchanting Creation Process: A Step-by-Step Walkthrough
Now for the fun part – bringing our Disney pals to life! This process is straightforward, and you’ll be amazed at how quickly these come together.
-
Prepare the Head and Ears: Take your largest Styrofoam ball (the head) and your two smaller Styrofoam balls (the ears). You’ll need to attach the ears. The easiest way is to use your hot glue gun. Apply a generous amount of hot glue to one side of each smaller ball and press them firmly onto the top of the larger ball, spacing them about 2-3 inches apart, and angling them slightly outwards. Hold them in place for about 30 seconds until the glue sets. Make sure they are securely attached.
-
Create the Stem Connection: Cut your wooden dowel rod to your desired length. For a standard topiary, you might want a stem of about 18-24 inches. Now, you need to anchor this stem to the head. You can do this in a couple of ways:
- Method 1 (Floral Foam): Cut a piece of floral foam or a thick Styrofoam block that fits snugly into the bottom of your largest Styrofoam ball. Push one end of the dowel rod firmly into the foam, creating a secure base for the stem. Then, use hot glue to secure the foam (and thus the dowel) to the inside of the Styrofoam ball.
- Method 2 (Direct Glue): You can also try to directly glue the dowel to the Styrofoam ball, but this can be less stable. Apply a very generous amount of hot glue to one end of the dowel rod and quickly push it into the bottom center of the large Styrofoam ball. Hold it firmly until it sets.
-
Cover the Ears (Mickey & Minnie): This is where your chosen material comes in.
- Felt/Craft Foam: Start applying your small squares of black felt or craft foam to the ear balls using hot glue. Work in small sections, overlapping the pieces slightly to ensure full coverage and no gaps. Imagine you’re tiling a surface.
- Pom-Poms: Apply hot glue to a section of the ear ball and press pom-poms onto it, packing them in tightly. Continue this all over both ears.
-
Cover the Head (Mickey & Minnie): Repeat the covering process from step 3 for the large Styrofoam ball. Ensure you completely cover the ball with your chosen material, working around where the ears are attached.
-
Add Minnie’s Bow: For Minnie, cut out a bow shape from your red or pink craft foam or felt. A classic Minnie bow has a central knot and two loops. You can simply glue this directly onto the head, positioned between the ears, or slightly to one side for a dynamic look. I like to place it slightly off-center.
-
Prepare the Pot Base: Place your pot on a protected surface. Add your filler material (rocks, pebbles, or Styrofoam scraps) to the bottom of the pot. This adds weight to prevent tipping. You want the filler to come up about two-thirds of the way.
-
Anchor the Stem in the Pot: Insert the free end of your dowel rod into the pot, pushing it down into the filler until it feels stable. Add more filler around the dowel to secure it firmly. If you’re worried about stability, you can add a generous amount of hot glue to the filler around the dowel for extra reinforcement.
-
Finishing Touches: Once everything is dry and secure, give your topiaries a gentle wiggle to ensure they are stable. Trim any stray felt or foam pieces. You’ve done it!
Styling Your Whimsical Creations
These topiaries are naturally eye-catching, but here are some tips to make them blend beautifully into your décor:
- Color Palette: For a classic Mickey look, stick to black and red accents. Minnie’s bow is the perfect pop of color. If you want to be more subtle, use different shades of green for a more traditional topiary look, or even a metallic silver or gold spray paint (though that might push the budget!).
- Texture Play: Mixing textures can add depth. If you used felt for the body, perhaps add a small fabric ribbon or embellishment to the pot. If you used pom-poms, the texture is already fantastic!
- Placement is Everything:
- Mantlepiece Magic: Flank a mirror or artwork with your topiaries. You can place them on either side of a central object for symmetry.
- Bookshelf Buddies: Nestled between books, they add a playful surprise. Make sure they don’t overwhelm the books visually.
- Entryway Welcome: A cheerful greeting for guests on a console table.
- Child’s Room Charm: Perfect on a dresser or shelf for a touch of Disney fun.
- Don’t Overdo It: Remember, these are accent pieces. Let them shine without competing with too many other busy decorations.
Keeping Your Disney Friends Tidy: Post-Week One Maintenance
After the initial excitement, keeping your topiaries looking fresh is easy:
- Dusting: A gentle dusting with a soft cloth or a feather duster should suffice. For pom-pom versions, a quick blast from a hairdryer on a cool setting can dislodge dust.
- Loose Bits: If any felt or foam pieces come loose, a tiny dab of hot glue will secure them back in place.
- Stability Check: Periodically check the stability of the stem in the pot. If it feels wobbly, add more filler or a bit more hot glue around the base.
Avoiding the Villains: Mistakes That Can Make This Fail
Even with the best intentions, a few common pitfalls can lead to a less-than-magical result:
-
Weak Glue Joints: The most common mistake is not using enough hot glue, or not holding the pieces long enough for the glue to set. This leads to wobbly ears or stems that detach. Be generous with the glue!
-
Poor Stem Stability: If the dowel rod isn’t secured well in the pot, your topiary can easily tip over. Ensure the filler is packed tightly and consider adding glue for extra security. For rental properties, ensure your filler is heavy enough not to require permanent fixes.
-
Uneven Coverage: When covering the Styrofoam balls, gaps are the enemy! Take your time and overlap your pieces of felt or foam to ensure a smooth, complete surface. This is especially true for pom-poms – pack them in tightly!
-
Ignoring Proportion: Using ears that are too small or too large for the head can make the overall effect look odd. Stick to the recommended Styrofoam ball sizes or adjust accordingly.
-
For Rentals: No Drilling! This project is perfect for renters because it requires no drilling. However, if you’re tempted to “improve” stability by drilling into a wall or furniture, resist! The beauty of this project is its freestanding nature.
With these tips and tricks, you’re well on your way to creating your own enchanting Mickey and Minnie topiaries. They’re a testament to the fact that you don’t need a huge budget to bring a little bit of magic and personality into your home. Happy crafting!
Conclusion
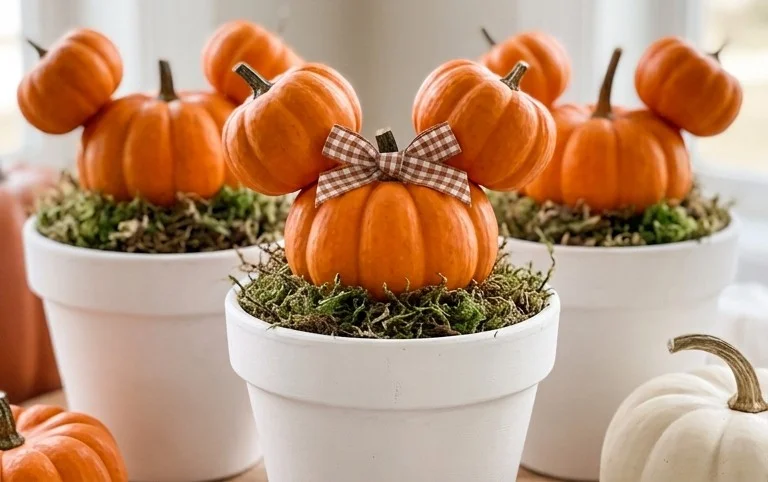
These adorable Mickey and Minnie topiaries are more than just a craft; they’re a delightful way to infuse a touch of Disney magic and organized charm into your everyday. Imagine returning home to these cheerful touches – it truly makes a difference in brightening your space and your mood!
Ready to bring this magic to life? Your smallest first step is simply to grab one foam ball and a few faux flowers on your next dollar store run. You can start building your own Mickey and Minnie topiaries today!
For a splash of whimsical decor in the kitchen, consider using smaller floral foam balls to create tiny Mickey head centerpieces. Or, if your budget is tight, opt for green painted craft foam and decorative moss to achieve a similar charming look.
We hope these Mickey and Minnie topiaries inspire you! Feel free to explore more creative home decor and organization ideas to make your home uniquely yours.
